
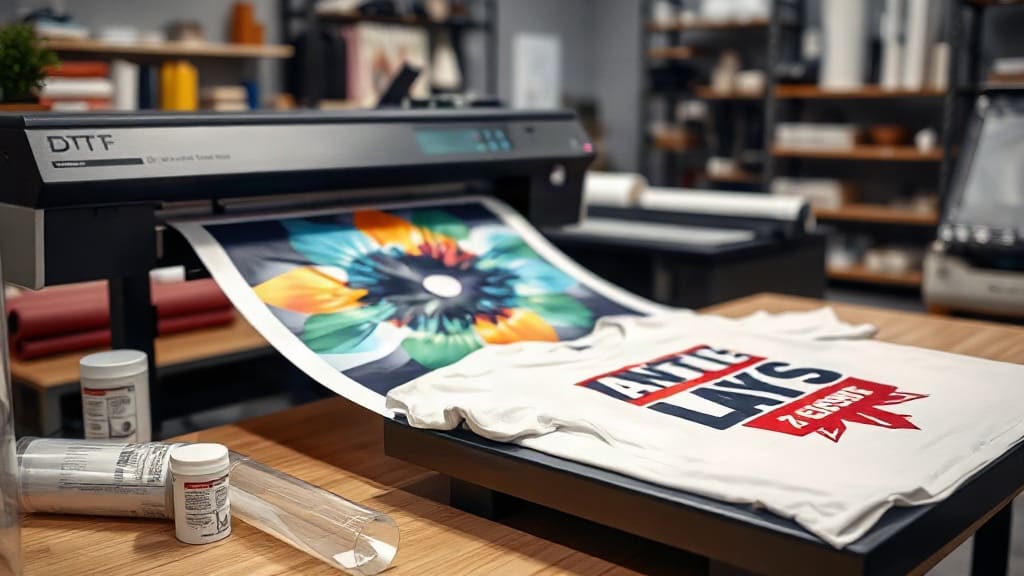
DTF printing has taken the custom apparel world by storm, and for good reason. If you've been searching for a way to print vibrant designs on various fabrics without the hassle of weeding or complicated setups, then direct-to-film might be exactly what you need. In this guide, we'll break down everything you need to know about this innovative printing method, from how it works to what equipment you'll need, and even compare it to other popular techniques.
What Is DTF Printing?
DTF stands for Direct to Film. It's a printing process where a design is printed onto a special film using a printer equipped with white ink, then transferred to fabric using a heat press and adhesive powder. The result is a durable, stretchable, and vibrant print that can be applied to a wide range of materials, including cotton, polyester, blends, and even leather.
The process was developed as an alternative to traditional methods like screen printing and vinyl, offering more flexibility and ease of use. Unlike screen printing, which requires separate screens for each color, DTF allows for full-color prints with gradients and intricate details in a single pass. It has quickly become a favorite among small businesses and hobbyists alike.
How Does DTF Printing Work?
Understanding the workflow is essential to appreciate why this technology is so appealing. Here's a step-by-step breakdown of the entire process, from digital file to finished product.
Step 1: Design and Preparation
First, you create or obtain a design using graphic software. The design should be in a high-resolution format, ideally with transparent backgrounds. You'll need to mirror or flip the image horizontally, just like with transfer papers, because it will be printed onto the film and then transferred.
Step 2: Printing onto Film
Next, a special DTF printer prints the design onto a PET film. These printers are often modified versions of standard inkjet printers that can handle white ink. The white ink is crucial because it creates a base layer that makes colors pop on dark fabrics. The printer lays down the CMYK colors first, followed by a layer of white ink on top.
Step 3: Applying Adhesive Powder
While the ink is still wet, a hot-melt adhesive powder is applied over the entire printed area. This powder sticks to the wet ink. Excess powder is then removed, and the film is pre-cured in an oven or with a heat source to melt and set the powder onto the ink. This adhesive is what will bond the design to the fabric.
Step 4: Transfer to Fabric
The prepared film is placed onto the fabric with the printed side down. Then, using a heat press at a specific temperature (usually around 160°C to 170°C) and pressure, you press it for about 10 to 20 seconds. The heat activates the adhesive, causing it to bond with the fabric fibers.
Step 5: Peeling and Finishing
After pressing, you let it cool for a few seconds, then peel off the film. The result is a vibrant, soft-to-the-touch print that's ready to wear. Some professionals recommend a second press with a silicone paper to ensure the adhesive is fully cured and the print has a smooth finish.
Why Choose DTF Over Other Methods?
There's a reason why so many print shops are adding DTF to their services. It offers a unique combination of benefits that appeal to both business owners and customers.
Versatility Across Fabrics
One of the biggest advantages is its versatility. Unlike sublimation, which only works on polyester, DTF can print on natural fibers, synthetic blends, and even hard surfaces like wood or glass with the right adhesive. This opens up a world of possibilities for product lines.
No Weeding Required
If you've ever worked with vinyl, you know how tedious weeding can be. With DTF, there's no weeding necessary. The entire design is printed and transferred, including all the small details. This saves significant time and labor, especially for complex designs.
Soft Hand Feel and Durability
DTF prints have a soft hand feel, similar to screen printing but without the heavy plastisol layer. They also withstand repeated washing without cracking or fading. This makes them ideal for garments that see frequent use.
Full Color with High Detail
Since DTF uses a standard CMYK color model plus white, you can achieve gradients, shadows, and photorealistic details effortlessly. There's no limitation on the number of colors, so your imagination is the only boundary.
Cost-Effective for Small Runs
Screen printing usually requires a high setup cost, making it impractical for small orders. DTF has virtually no setup cost, so you can produce one-off items or small batches economically. This is perfect for custom orders, samples, or testing new designs.
What Equipment Do You Need for DTF Printing?
To start with DTF, you'll need to invest in some essential equipment. While the initial investment might seem daunting, it's comparable to other digital printing methods and can pay off quickly.
The DTF Printer
At the heart of the setup is a DTF printer. These are typically based on Epson or Mutoh printers that have been converted to handle pigment inks and white ink. Some models come preconfigured for DTF, while others require a conversion kit. You'll also need a RIP (Raster Image Processor) software to manage the printing process and color profiles.
Heat Transfer Film
You'll need a supply of PET film specifically designed for DTF. This film has a coating that holds the ink and releases it cleanly during transfer. It comes in various sizes, so you can choose what fits your printer and project.
Adhesive Powder
The hot-melt adhesive powder is crucial. It's available in different particle sizes depending on the desired effect; finer powders are used for detailed prints, while coarser ones provide a thicker adhesive layer for heavy fabrics.
Heat Press
You'll need a heat press that can reach the required temperatures and maintain consistent pressure. A clamshell or swing-away press works well. Some prefer a flat press for larger items, but the key is even heat distribution.
Shaker and Curing Oven
While not strictly mandatory, a powder shaker and curing oven greatly streamline the process. The shaker applies the powder evenly, and the oven pre-cures the powder so it doesn't scatter during transfer. For small operations, you can manually sprinkle powder and use a heat gun, but it's less efficient.
DTF vs. Other Printing Technologies
To fully understand where DTF stands, it's helpful to compare it directly with other popular methods.
DTF vs. DTG (Direct to Garment)
DTG is similar in that it prints directly onto the garment, but it requires a pretreatment for dark fabrics and the printer is often more expensive. DTF, on the other hand, allows you to print onto transfer film in bulk and then apply as needed, which can be faster for multiple orders. DTF also tends to have better durability on various fabrics.
DTF vs. Sublimation
Sublimation is limited to polyester and light-colored garments, and it requires a special coating on hard surfaces. DTF works on any fabric, making it far more versatile. Sublimation, however, can produce prints that are extremely soft and integrated into the fabric, which some prefer for athleticwear.
DTF vs. Screen Printing
Screen printing is ideal for large quantities due to its low per-unit cost, but it has high setup costs and is impractical for multicolor small runs. DTF offers a middle ground: no setup, full color, and reasonable pricing for low to medium quantities.
Common Mistakes to Avoid in DTF Printing
Like any printing process, DTF has a learning curve. Here are some common pitfalls and how to avoid them.
Using the Wrong Film
Not all films are created equal. Using a cheap or incompatible film can lead to poor ink adhesion or peeling. Always use film that is specifically recommended for your printer and inks.
Incorrect Powder Application
Too much powder can cause a thick, rough texture, while too little may result in poor adhesion. Aim for a thin, even layer that covers the printed area completely. The powder should be applied while the ink is still wet to ensure proper bonding.
Heat Press Settings
Temperature and pressure are critical. If the temperature is too low, the adhesive won't melt properly, and the transfer will fail. Too high, and you might scorch the fabric. Always test on scrap fabric first and adjust accordingly.
Skipping the Cure
The pre-curing step is essential. It melts the adhesive powder so it attaches firmly to the ink. Skipping this can result in powder falling off during transfer, leaving you with a patchy print.
Tips for Successful DTF Printing
To get the best results, consider these expert tips that can elevate your prints from good to outstanding.
Invest in Good RIP Software
Color management is crucial. A good RIP will help you achieve accurate colors and smooth gradients. It also allows you to control the white ink layer density and create proper color separation.
Maintain Your Printer
White ink is notorious for clogging. Regular cleaning cycles and daily use prevent the ink from settling and drying in the printhead. Always follow the manufacturer's maintenance schedule.
Choose the Right Fabric
While DTF works on many fabrics, some are better suited than others. Crisp, firm fabrics like cotton-poly blends yield the best results. Very stretchy or textured fabrics may require extra care with pressure and temperature.
Test, Test, Test
Before committing to a large batch, always run a test print on the actual fabric you plan to use. This helps you fine-tune your settings and avoid costly mistakes.
Cost Considerations for DTF Printing
The initial investment in DTF equipment can range from a few thousand dollars for a starter setup to tens of thousands for commercial-grade machines. However, the running costs are relatively low. Ink, film, and powder are the main consumables, and they vary in price based on quality and volume.
When calculating per-print costs, consider the amount of ink and powder used, which depends on the design size and complexity. On average, a 10x10 cm print might cost around 5 to 10 cents in consumables, excluding the garment. This makes DTF highly profitable for custom orders.
Future Trends in DTF Printing
The DTF industry is evolving rapidly. We're seeing improvements in ink formulations that enhance stretchability and durability. There are also new films that are thinner and more eco-friendly. Additionally, printers are becoming more affordable and user-friendly, making this technology accessible to even the smallest home-based businesses.
Another trend is the integration of DTF with other technologies, such as laser cutting, to create custom patches or labels. The possibilities are endless, and it's an exciting time to be part of this printing revolution.
Frequently Asked Questions (FAQ)
Is DTF printing cost-effective for small business startups?
Yes, DTF is one of the most cost-effective methods for small businesses. The lack of setup fees and ability to print single items on demand without wasting inventory makes it ideal for startups. You can offer a wide range of products without investing heavily in stock.
Can DTF prints be used on dark-colored garments?
Absolutely. The white ink layer in DTF ensures that colors remain vibrant even on dark fabrics. This is a significant advantage over sublimation, which only works on light colors.
How long does a DTF print last?
With proper application and care, DTF prints can last for years without significant fading or cracking. They are durable enough to withstand regular washing and drying. However, the longevity depends on the quality of materials and the transfer process.
What is the minimum quantity for DTF printing?
There is no minimum order requirement. You can print a single design or a thousand, and the cost per piece remains relatively stable. This flexibility is a major draw for businesses that offer custom, made-to-order products.
Do I need special software to create designs for DTF?
You can use any standard design software like Photoshop, Illustrator, or CorelDRAW. The key is to save your design in a high-resolution format with a transparent background, preferably PNG. Your RIP software will handle the rest.