
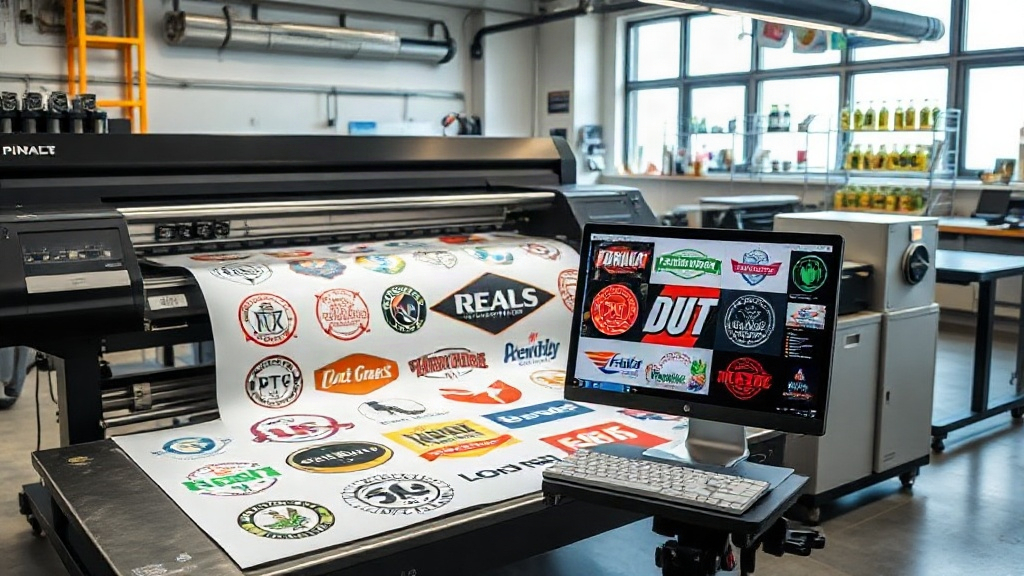
If you're in the custom apparel business, you've probably heard about DTF printing. It's a game-changer for small shops and large operations alike, offering vibrant colors and durability on various fabrics. But as your order volume grows, manually arranging prints on transfer film becomes a bottleneck. That's where a DTF gangsheet builder comes in. This tool helps you nest multiple designs onto a single sheet, saving time, money, and materials. In this article, we'll explore how to leverage a gang sheet builder to streamline your workflow and increase your bottom line.
What Is a DTF Gangsheet Builder?
A DTF gangsheet builder is software that allows you to arrange multiple DTF transfer designs onto a single film sheet. Instead of printing each design individually, you combine them into one large sheet, known as a gang sheet. This approach maximizes the use of transfer film and ink, reduces waste, and speeds up the printing process. Whether you're printing 10 shirts or 1000, a gang sheet builder ensures you're using your resources efficiently.
Why Use a DTF Gangsheet Builder?
Let's dive into the key benefits that make a gang sheet builder indispensable for DTF printers.
Cost Savings
Transfer film and ink are significant expenses in DTF printing. By grouping designs, you minimize wasted space on the film. For example, if you have several small logos, arranging them tightly on one sheet means you use less film per print. Over hundreds of orders, these savings add up, directly improving your profit margin.
Time Efficiency
Manually arranging designs in a graphics program can take hours, especially for complex orders. A dedicated gang sheet builder automates the nesting process. You upload your designs, set the sheet size, and the software optimizes the layout in seconds. This frees you to focus on other tasks, like customer service or marketing.
Consistency and Quality
With a gang sheet builder, you ensure consistent spacing and orientation of each design. This reduces the risk of cutting into a design or misaligning it during pressing. The result is a professional finish that keeps customers coming back.
How to Choose the Right DTF Gangsheet Builder
Not all gang sheet builders are created equal. Here are factors to consider when selecting one for your shop.
- Ease of Use: Look for an intuitive interface that doesn't require a degree in graphic design. Drag-and-drop functionality and presets are big pluses.
- Compatibility: Ensure the software supports your printer's file formats (e.g., PDF, PNG) and can export in the required resolution.
- Nesting Algorithms: Advanced algorithms can pack designs more tightly, saving more film. Test the software with a variety of design shapes to see how well it performs.
- Integration: If you use order management or e-commerce platforms, check if the builder integrates directly to pull order data and design files.
- Support and Updates: A reliable company offers customer support and regular updates to fix bugs and add features.
Step-by-Step: Using a DTF Gangsheet Builder
Here's a typical workflow to get you started.
- Prepare Your Designs: Ensure each design is in a high-resolution file, preferably PNG with transparent background. Check that colors are in CMYK or RGB as required.
- Upload to Builder: Open your gang sheet builder and import all designs. Most tools allow batch upload.
- Set Sheet Size: Choose the dimensions of your transfer film. Common sizes are 13x19 inches or 22x24 inches, but you can customize.
- Arrange Designs: Let the software auto-arrange, or manually adjust if needed. Pay attention to spacing; typically, 0.1-0.2 inches between designs is sufficient for cutting.
- Review and Export: Double-check the layout for any overlaps or cut-offs. Then export the file as a high-resolution PDF or PNG.
- Print and Press: Print the gang sheet on your DTF printer, apply adhesive powder, and cure. Then cut out individual transfers and press onto garments.
Best Practices for Gang Sheet Creation
To get the most out of your DTF gangsheet builder, follow these tips.
Group Similar Designs
If you have multiple orders with the same design, place them together. This reduces the number of cuts and speeds up pressing. For instance, a sports team ordering 20 jerseys with the same logo can be ganged into one sheet, then cut and pressed individually.
Mind the Grain Direction
DTF film has a slight grain, and designs should be oriented consistently to avoid stretching. Most builders allow you to rotate designs, but be cautious not to rotate 90 degrees if it affects quality.
Use Nesting Features
Advanced builders have nesting algorithms that rotate and reposition designs to fill gaps. Enable this feature to maximize density. However, always review the layout; sometimes manual tweaks yield better results for irregular shapes.
Test Print First
Before committing to a full sheet, do a test print on a small scale to check color accuracy and alignment. This saves film and ink in the long run.
Common Mistakes to Avoid
Even with a good builder, these pitfalls can cost you.
- Overcrowding: Packing designs too tightly can make cutting difficult and increase the risk of damaging transfers. Leave adequate space.
- Ignoring Resolution: Low-resolution designs will look pixelated when printed. Always use 300 DPI or higher.
- Forgetting Bleed: If designs have borders, ensure there's a bleed area so cutting doesn't trim into the design.
- Not Updating Software: New versions often include improved algorithms and bug fixes. Keep your builder updated.
Maximizing ROI with Gang Sheets
Let's talk numbers. Suppose you print a 13x19 inch sheet that costs $2 in film and $1 in ink. If you can fit 10 designs instead of 8, your cost per design drops from $0.375 to $0.30. Over 1000 designs, that's a savings of $75. Plus, faster production means you can take on more orders, increasing revenue. A DTF gangsheet builder is not just a tool; it's an investment in your business's scalability.
Integrating Gang Sheets into Your Workflow
To fully benefit, integrate your gang sheet builder with other tools. For example, if you use a print-on-demand platform, look for a builder that can automatically pull orders and generate gang sheets. This reduces manual data entry and errors. Also, consider a RIP (Raster Image Processor) software that works seamlessly with your builder to ensure color management and print settings are optimized.
Frequently Asked Questions
What is the ideal spacing between designs on a DTF gang sheet?
A spacing of 0.1 to 0.2 inches is typically sufficient to allow for clean cutting without wasting film. However, if your cutter has a wider blade, you may need more space.
Can I use a DTF gangsheet builder for other printing methods?
While designed for DTF, some builders can be adapted for DTG or sublimation if they support the required file formats and sheet sizes. However, DTF-specific features like powder application considerations may not apply.
How do I ensure colors are consistent across a gang sheet?
Use a color-managed workflow: calibrate your monitor, use ICC profiles for your printer, and consistently apply the same color settings in your builder. Test prints are also crucial.
Is it better to arrange designs manually or use auto-nesting?
Auto-nesting is faster and often more efficient for complex layouts, but manual arrangement gives you control over specific placements. A combination works best: use auto-nesting, then tweak manually.
What file format should I use for designs in a gang sheet builder?
PNG with transparent background is ideal for DTF. Ensure files are at 300 DPI and in RGB color mode for best results. Some builders also accept PDF or TIFF.
Final Thoughts
Adopting a DTF gangsheet builder is a smart move for any DTF printer looking to scale. It cuts costs, saves time, and improves quality. By following the tips and best practices outlined here, you can optimize your gang sheets and watch your profits grow. Remember, the key is to experiment, measure results, and continuously refine your process. Happy printing!