
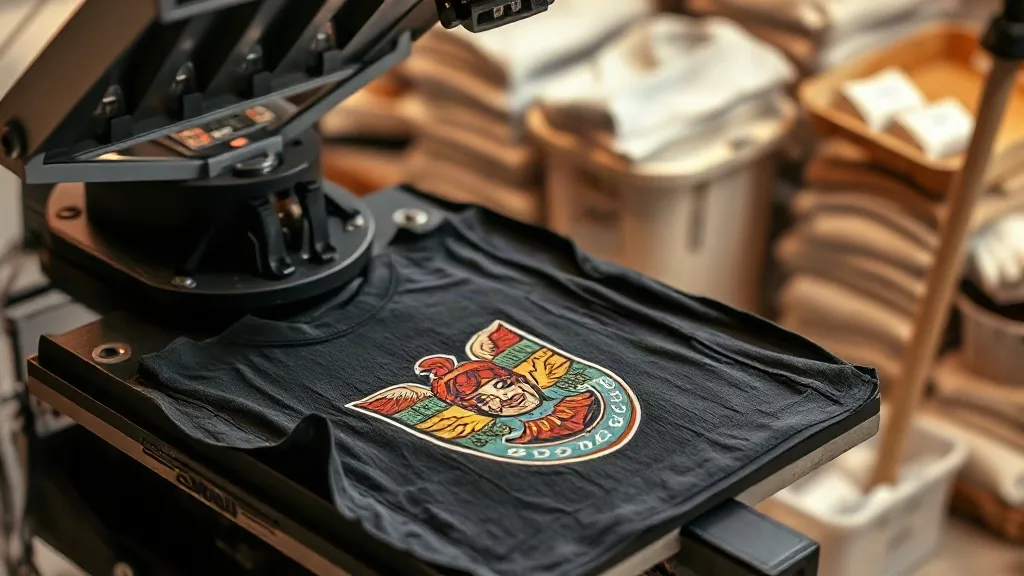
You pull a shirt off the press, and the edge of the design lifts as your thumb drags across it. Another one curls at the corner before the customer even sees it. Before you blame the film, know this: in most small shops, the failures that get blamed on dtf transfers actually start at the heat press or in the drawer where the sheets are stored. The printed sheet is only half the job. The other half is what you do in the ninety seconds after it comes out of the package.
This guide walks through the mistakes that show up most often on a busy production table, why each one happens, and the specific adjustment that fixes it. No theory about printer heads, no film chemistry. Just the press, the peel, the garment, and the habits that decide whether a print survives fifty washes or lifts on the first try-on.
Start With the Garment, Not the Press
Every troubleshooting conversation should begin here, because no press setting can rescue a print applied to the wrong fabric. DTF film bonds to cotton, polyester, blends, and even canvas, but the behavior changes with fiber content. Cotton holds ink on the surface and gives you rich, slightly matte color. Polyester absorbs dye differently and can show a faint halo if the garment is dark and the ink layer is thin. Nylon and coated fabrics are a different story entirely and often need a test piece before you commit an order.
Two practical checks before you press anything:
- Pre-press the garment for 5 to 8 seconds. This drives out moisture that turns to steam under the film and causes bubbles. It also smooths wrinkles that would otherwise create thin spots in the ink.
- Know your fabric's heat ceiling. Some performance polyesters and elastane blends scorch or glaze above 300°F. If the care label is vague, press a hidden hem first.
If you are sourcing blanks for a run and want the film to behave predictably, stick to one fabric family per order. Mixing a heavyweight cotton tee with a silky poly blend in the same batch means adjusting pressure and time mid-run, and that is where inconsistency creeps in.
The Press Settings That Cause Most Failures
Three variables decide the bond: temperature, pressure, and time. Get any one of them wrong and the print looks fine on the table but fails in the wash.
Temperature: The Window Is Narrower Than You Think
Most films want 300°F to 320°F at the platen. Below that, the adhesive never fully activates and you get edge lift. Above it, the carrier film can wrinkle or the ink can turn glossy and stiff. Use an infrared thermometer to confirm your press is actually hitting the number on the display. Presses drift, and a 20-degree gap is enough to explain a batch of prints that peel at the corners.
Pressure: Medium and Even
Too little pressure leaves air pockets under the film. Too much squeezes the ink outward and creates a squashed, wide edge that cracks later. Aim for medium pressure, the point where you feel firm resistance but can still close the handle without forcing it. On a pneumatic press, that is usually around 40 to 60 psi. On a clamshell, it is a feel thing, and it is worth pressing a scrap to calibrate.
Time: Follow the Film, Not the Habit
Ten to fifteen seconds is the common range, but the film you buy should dictate the exact number. If your supplier says 12 seconds at 310°F, do not round up to 20 because it feels safer. Overpressing makes the carrier release too early and can leave adhesive residue that dulls the finish.
Peel Timing: Hot, Cold, or Somewhere Between
This is the single most misunderstood step, and it explains a huge share of complaints. Some films are hot peel, meaning you remove the carrier while the sheet is still warm. Others are cold peel and need to cool completely, usually a minute or more, before you pull. Peel a cold-peel film too early and the ink stretches or tears. Peel a hot-peel film too late and the adhesive grabs the carrier instead of the shirt.
If your film does not come with clear instructions, run a test: press a small square, peel half while warm, let the other half cool, then compare. The one that releases cleanly with no ink left on the carrier tells you the correct method. Write that answer on the box. Future you will forget.
Why Prints Look Dull After Pressing
Dull or washed-out color is rarely a printer problem. In most cases the ink layer never fully transferred because the film shifted during pressing or the pressure was uneven. Check these in order:
- Did the film move? A sheet that slides even a few millimeters during the press creates a double image or a soft, hazy edge. Use a light tack spray or a heat-resistant tape on large designs.
- Was the garment damp? Moisture under the film turns to steam and lifts the ink slightly, which scatters light and reads as dull.
- Did you press through a cover sheet? Some films need a protective sheet or parchment over the carrier. Skipping it can leave a texture imprint from the press platen.
When someone searches for dtf transfers near me after a disappointing batch, the answer is usually not a new supplier. It is a five-minute calibration of the press they already own.
Storage Habits That Decide Long-Term Quality
Film is sensitive to humidity and dust. Sheets left open on a shelf absorb moisture from the air, and that moisture shows up as bubbles or weak adhesion weeks later. Store unused film flat, in the original bag, sealed, away from direct sun and heat sources. Rolled film should stay rolled, not folded, because creases press into permanent marks. If you live in a humid climate, a silica packet in the storage bin is cheap insurance.
Printed sheets that sit around before pressing are a separate issue. Once printed, the powder and ink are exposed, and dust settles into the design. Press within a day or two when possible, and keep printed sheets in a closed drawer rather than on an open table near a window.
Wash Testing Without Wasting a Shirt
You do not need a full wash cycle to know whether a print will hold. A simple pull test on a scrap tells you most of what you need. Press a small design onto a fabric offcut, let it cool, then try to lift an edge with your fingernail. If it resists, the bond is good. If it peels with light pressure, your temperature or pressure is off, and no amount of washing will fix it.
For a real-world check, wash one sample inside out in cold water and tumble dry low. A properly applied print should survive dozens of cycles without cracking or fading. If it fails on the first wash, revisit the press settings before you change suppliers.
When to Change Suppliers Instead of Settings
Sometimes the film really is the problem. Consistent failures across multiple garments, temperatures, and operators point to a quality issue. Watch for film that wrinkles in the package, adhesive that feels tacky at room temperature, or ink that flakes off the carrier before you even press it. Those are signs of a product stored badly or manufactured poorly. A reliable source matters as much as a good press. If you are comparing options, browsing a curated dtf transfers collection gives you a sense of what consistent quality looks like before you commit to a bulk order.
Frequently Asked Questions
Why do my DTF prints peel at the corners after washing?
Corner peel almost always means the edges did not receive full pressure or heat. Check that the film extends flat past the design with no curl, and increase press time by two seconds. If the corners of the film itself were lifted during pressing, the adhesive never bonded there.
Can I press DTF transfers onto a shirt that already has a print?
You can, but place the new design so it does not overlap the old one. Pressing over an existing print traps air and prevents a clean bond. If overlap is unavoidable, use a lower temperature and a longer dwell time, and test on a scrap first.
How long should I wait before washing a freshly pressed shirt?
Let it cool completely and rest for at least 24 hours. The adhesive continues to cure as it sits. Washing immediately after pressing is one of the most common reasons a print that looked perfect fails early.
Does fabric color affect how DTF prints look?
Yes. White ink sits under the color layer, so dark garments get a solid base and bright results. On very light garments with thin ink coverage, the fabric color can show through slightly. Request a sample press on your actual blank before a large run.
What temperature should I use for polyester blends?
Start at 300°F and keep the time short, around 10 seconds. Polyester can glaze or scorch above 320°F, and some performance fabrics need even lower heat. Always pre-test on a hidden area of the garment.