
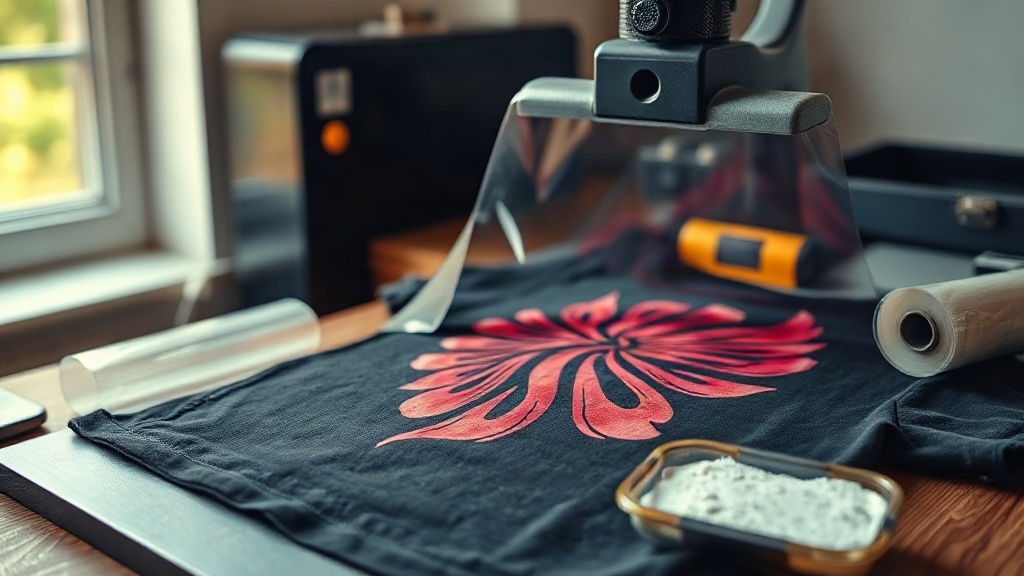
Most people discover DTF printing after a frustrating run with vinyl or a heat press that scorched a favorite shirt. Direct to film, or DTF, solves a specific problem: getting full-color, highly detailed artwork onto fabric without cutting every tiny shape by hand. Instead of pressing colored vinyl, you print your design onto a special film, dust it with adhesive powder, cure it, and then heat press it onto the garment. The result is a soft, stretchy transfer that holds up through dozens of washes when you handle the steps correctly.
This guide walks through how the process actually works, where it fits best, and the mistakes that cause peeling or dull colors. If you are setting up a small shop, printing for a team, or just tired of ruined shirts, these are the details that separate a transfer that lasts from one that lifts in the dryer.
What DTF Printing Actually Is
DTF is a digital printing method. You print your artwork onto a PET film using a specialized printer loaded with pigment inks, often including white. After printing, you cover the wet ink with a thermoplastic powder, shake off the excess, and melt the powder in an oven or with a heat gun until it turns into a flexible adhesive layer. That film can then be stored and pressed onto a garment whenever you need it.
The key difference from DTG (direct to garment) is the film. With DTG you print straight onto the fabric, which limits you to certain cotton blends and requires careful pretreatment. With DTF, the ink never touches the fabric until the transfer is pressed, so you can use cotton, polyester, blends, canvas, and even some non-fabric items like tote bags or mouse pads. That flexibility is why small print shops have adopted it so quickly.
Why the White Ink Layer Matters
If you have ever printed a bright design on a dark shirt and watched it disappear, you know why DTF includes a white base. The printer lays down white ink underneath the color layers, which makes the colors pop on black, navy, or any dark fabric. The white also acts as a barrier so the garment color does not muddy your design. Without that layer, your reds turn maroon and your yellows turn mustard on a dark background.
What You Need to Get Started
You do not need a full industrial setup to begin. A basic DTF workflow includes a few core pieces of equipment, and you can scale up as demand grows. Here is the practical short list:
- A DTF printer with pigment inks and a white ink channel (or a converted printer designed for film)
- PET transfer film, usually available in sheets or rolls
- Thermoplastic adhesive powder, often called hot melt powder
- A powder shaker or a simple tray for manual application
- A curing oven or heat gun to melt the powder
- A heat press with consistent pressure and temperature control
For a home setup, many people start with pre-printed transfer sheets from a supplier and skip the printer entirely. That lets you test the pressing side of the process before investing thousands in equipment. Once you understand how the transfers behave on different fabrics, you can decide whether printing your own film makes sense for your volume.
Film and Powder Choices
Not all film behaves the same. Thinner films tend to feel softer on the garment but can be trickier to feed through a printer. Thicker films are more forgiving but may leave a slight edge you can feel with your fingers. The powder also matters: finer powder gives a smoother finish, while coarser powder can create a rougher, more textured hand feel. If you are selling shirts, order small samples of both and press them onto the exact fabric you plan to use.
The Pressing Steps That Decide Your Result
The printing gets the attention, but pressing is where most transfers fail. Temperature, pressure, and time all interact, and changing one means adjusting the others. A typical starting point is around 300 to 320 degrees Fahrenheit for 10 to 15 seconds with medium to firm pressure, but your film supplier's instructions should be your real guide.
- Pre-press the garment for a few seconds to remove moisture and wrinkles.
- Place the transfer with the adhesive side down against the fabric.
- Press with firm, even pressure. Do not use light pressure and hope for the best.
- Let the transfer cool completely before peeling the film. Cold peel is standard for most DTF films.
- If the edges lift, cover with parchment or a Teflon sheet and press again for a few seconds.
One detail people miss is moisture. Cotton holds water from the air, and that water turns to steam under the press. Steam gets trapped between the adhesive and the fabric, which weakens the bond. A quick pre-press solves most of this. If you are pressing a thick hoodie, pre-press it longer than a thin t-shirt.
Pressure Beats Temperature
When a transfer peels after washing, the instinct is to raise the temperature. That often makes things worse by scorching the film or the fabric. In most cases, the real problem is pressure. The adhesive needs to be pushed into the weave of the fabric, and light pressure leaves it sitting on top. Check your press for even pressure across the platen. A press that is tighter on one side will give you transfers that stick on the left and lift on the right.
Fabric Types and Realistic Expectations
DTF works on a wide range of materials, but the hand feel and durability vary. On 100% cotton, the adhesive grips the fibers well and the transfer feels soft. On polyester, especially smooth athletic polyester, the bond can be strong but the transfer may feel slightly stiffer because the fabric does not absorb the adhesive the same way. On nylon or waterproof coatings, adhesion can be poor, so test before committing to a large order.
Stretch is another factor. A design pressed onto a stretchy performance shirt needs to stretch with the fabric. DTF transfers do stretch, but a large solid block of ink will resist more than a design with fine lines and open space. If you are decorating yoga wear or cycling jerseys, keep large solid areas smaller and let the fabric show through where possible.
Washing and Care
Tell your customers to wash garments inside out in cold water and avoid fabric softener, which leaves a residue that can break down the adhesive over time. Tumble dry on low or hang dry. Following this, a properly pressed DTF transfer commonly lasts through many wash cycles without cracking or fading. It will not outlast the garment forever, but it holds up far better than a cheap iron-on sheet from a craft store.
Common Mistakes and How to Avoid Them
Most failed transfers trace back to a handful of avoidable issues. Curing the powder unevenly leaves sticky spots that grab lint and feel tacky. Overcuring turns the powder brittle, so it cracks when the garment stretches. Pressing with the film upside down sends the adhesive into the film instead of the fabric, and the transfer will not stick at all. Skipping the cool peel while the film is still hot can pull the design apart.
Another frequent problem is color shift. What looks vivid on screen may print duller because pigment inks on film behave differently than on paper. Build a small color test sheet with your most-used colors and press it onto both white and dark fabric. Keep that sheet near your printer as a reference so you can adjust before wasting film on a big order.
Frequently Asked Questions
Can I use DTF transfers on dark and light fabrics?
Yes. The white ink layer in the transfer makes DTF suitable for both. On light fabrics the white base is often reduced or omitted depending on the design, while dark fabrics rely on it to keep colors bright. Always confirm with a test press because the same artwork can look different across fabric colors.
How long does a DTF transfer last after washing?
With correct pressing and cold-water washing inside out, many transfers last through 50 or more wash cycles. Durability depends on the fabric, the pressure used, and how the garment is cared for. High heat in the dryer and fabric softener are the two fastest ways to shorten the life of a transfer.
Do I need a special printer for DTF, or can I use a regular inkjet?
A standard home inkjet will not work because DTF requires pigment inks and a white ink channel. You need a printer designed or converted for DTF. If you are not ready for that investment, buying pre-printed transfer sheets from a supplier is a practical starting point.
Why is my DTF transfer peeling at the edges?
Edge peeling usually means uneven pressure, not enough time under the press, or moisture in the fabric. Pre-press the garment, increase pressure, and make sure the entire transfer gets even contact. A second short press over the edges with a Teflon sheet often fixes minor lifting.
Is DTF better than vinyl for small detailed designs?
For intricate, multi-color artwork, DTF is usually faster and cleaner because there is no weeding. Vinyl still makes sense for single-color text and simple shapes where a crisp, thin edge matters. Many shops use both, choosing whichever suits the specific job.